
STEP 1:
One of our friendly dealers will come to site to evaluate positioning, access and pool requirements.
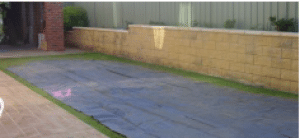
STEP 2:
A Template of the pool shape is laid out on the ground to create the initial shape of the pool.
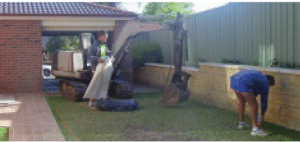
STEP 3:
The measurements of the pool are checked and squared up relevant to houses or other surrounding structures.
Once we are happy with the pool positioning an excavator is ready to start digging the pool hole.
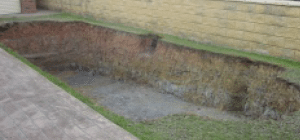
STEP 4:
The pool hole is then dug and the excavated materials are removed from site.
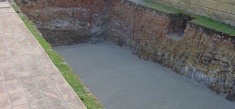
STEP 5:
The base material is then screaded to set heights for the pool to be placed into position.

STEP 6:
The crane is then positioned and set up. In this case the crane was set up at the front of the house with the pool being lifted over the house roof.

STEP 7:
The pool is then connected to the crane and the lift begins.

STEP 8:
Swimming pool being lifted over the roof of the house.
STEP 9:
The pool is then lowered down into position.

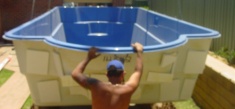
STEP 10:
The pools final sitting position is measured and squared up before the crane leaves the site, levels at this stage are also checked.

STEP 11:
Pipework, filters and lights are all connected and the process of back filling the water begins.
STEP 12:
The concrete bond beam/slab are then prepared and poured awaiting pavers/tiles to finish off the pool.

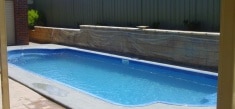
STEP 13:
The coping pavers/tiles are installed and your swimming pool water is balanced ready for swimming.